
How to Edit Intertidal Photos: Blackwater Photography

Taking photos at the tide pools is one of avid tide poolers’ favorite ways to document what they see. In this post, I’m going to walk you through how to turn your favorite tide pool photographs into blackwater photography.
If you’re new here, check out my series about how to improve your tide pool photography before you read this article. While everyone can take awesome photos at the tide pools, the technique outlined here is designed for compact underwater cameras using a flash or flash diffuser. If you aren’t using this equipment, this way of editing won’t entirely work. However, you can still learn some editing tips and tricks from this article. I used the MacBook’s built in editing software for this exercise, but you can do it on other machines and even most of it on your smart phone.
A quick word on blackwater photography before we begin. This term originally referred to the photos taken on blackwater dives, open water night diving where brave divers wait for the mass migration of animals from the depths to rise to the surface after dark. The photos from this kind of dive have a black background, almost as if they were take in a studio. For our purposes, blackwater photography refers to this black background that makes you subject really stand out and remove distractions.

I’m going to use this photo on the left as an example to walk you through this exercise. At first glance, this photo isn’t that great. My finger and all the algae is distracting and the nudibranch (an Ancula pacifica) is really small and upside down to the viewer. But by the time we are done, it will become the photo on the right. Read on for the five simple steps to make this transition.
Step 1: Rotate and Crop
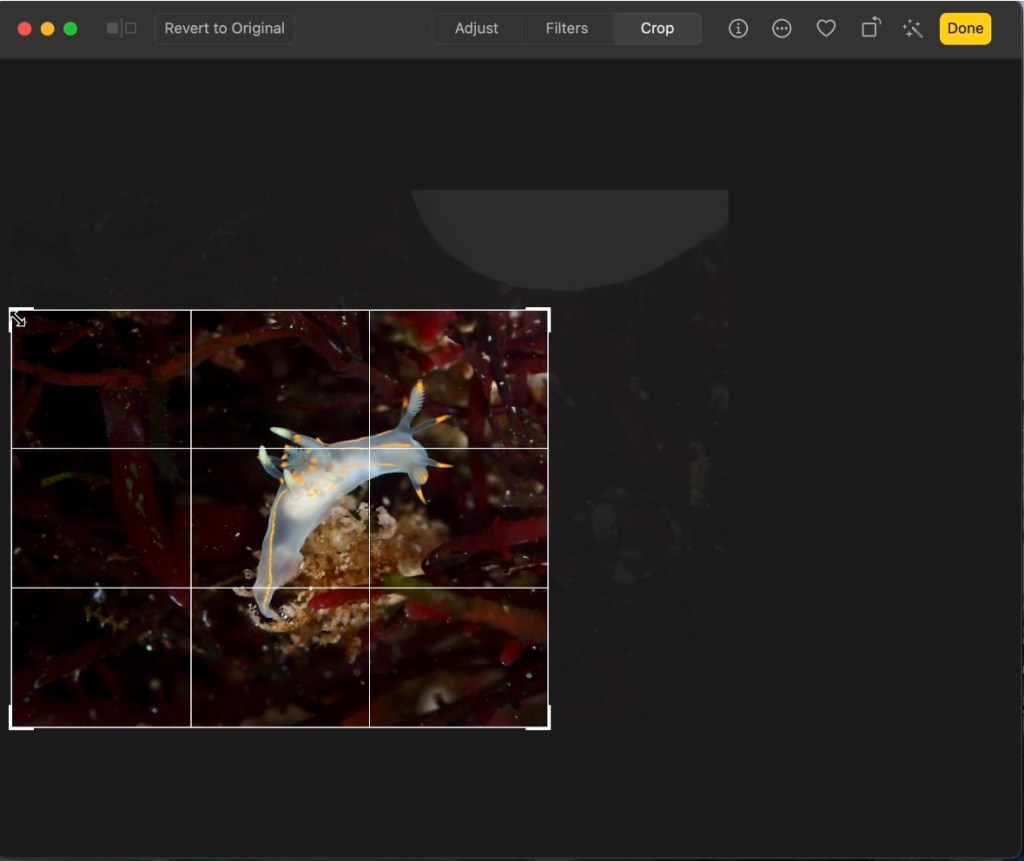
First, you will need to rotate and crop your photo as you like. In this shot, I turned the nudibranch to be in a more natural position and cropped out my hand that held the algae it was on.
Step 2: Auto and adjust light
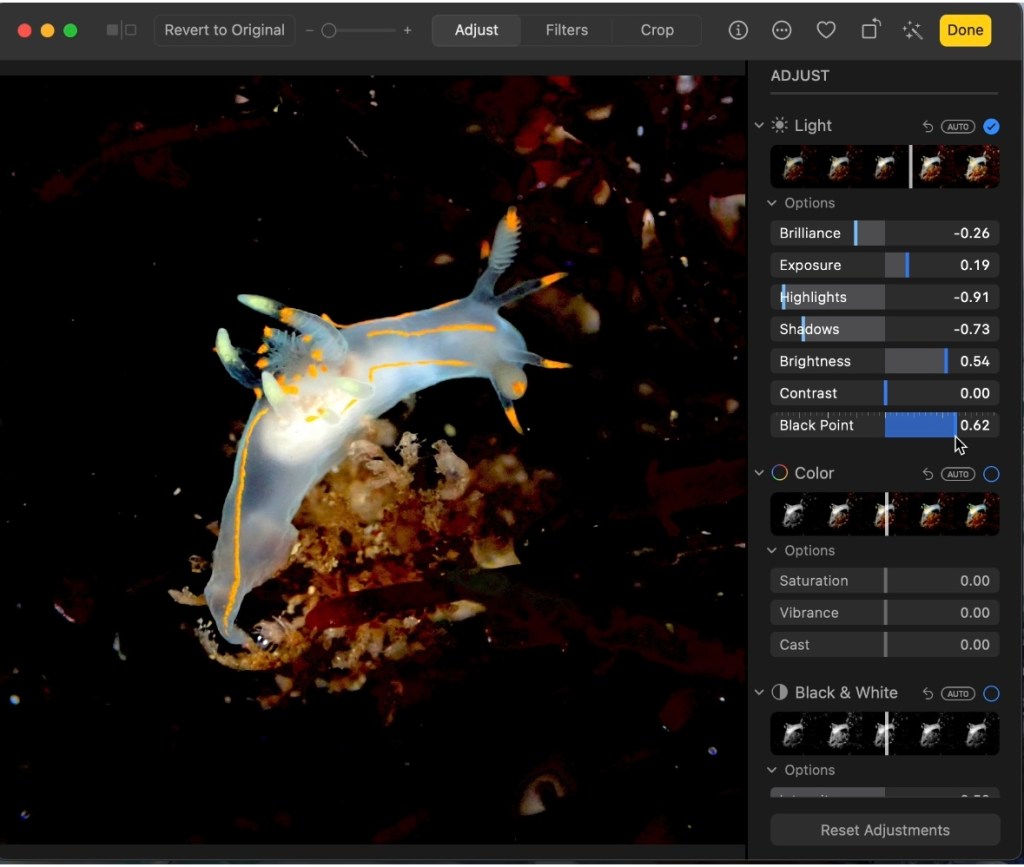
These are the most common adjustments made in photos and mostly impact the lighting. I usually let the program auto adjust the photo and then move the indicators to where I want. In this case since I was going for a blackwater photography look, my most important adjustments were to bring brilliance, highlights, contrast, and shadows down and the brightness and contrast up. Most of these changes were to darken the distracting algae in the background of the shot that I wanted to it to be completely black. You’ll need to play with the adjustments for every photo to achieve the affect you want as different colors, exposures, and textures react different to adjusting. You can see the amounts I adjusted each gradient for this photo in the screen shot above.
Step 3: Definition and Sharpness

I usually add a little definition and sharpness to my photos just because I like the affect it has. This is an optional step and not required to get that blackwater look. But increasing these factors can raise the overall quality of the photo.
Step 4: Vignette
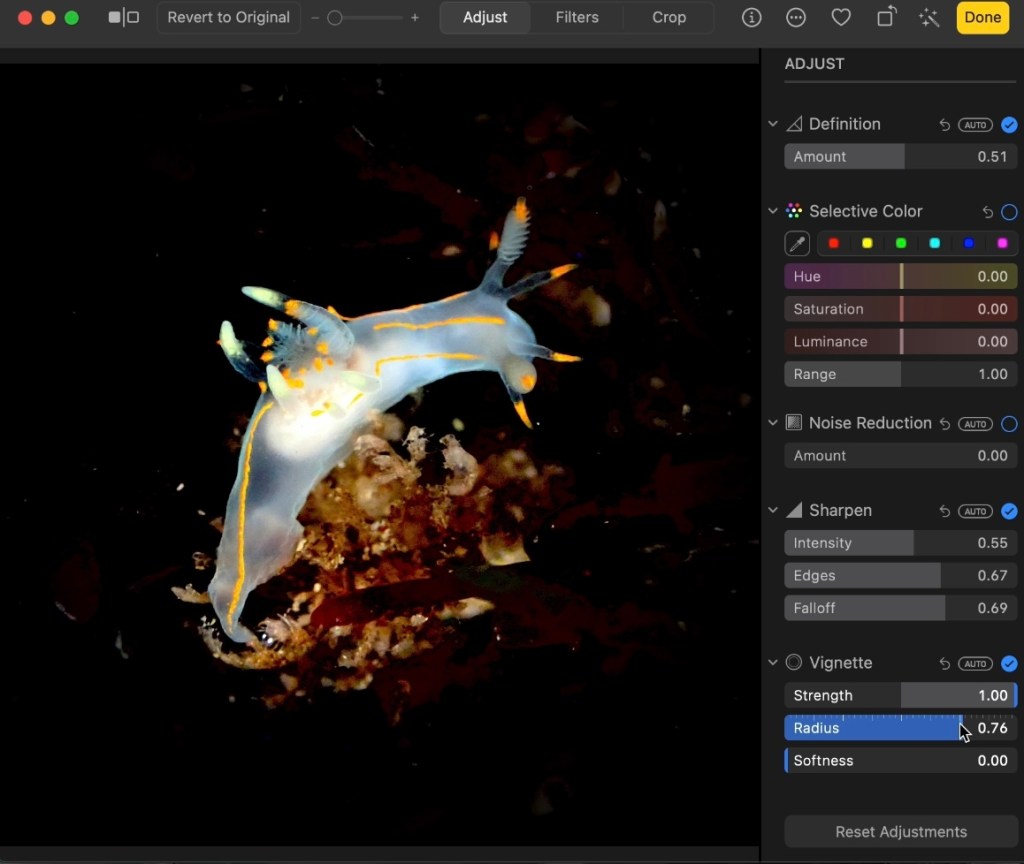
Since the background in this photo still had some red in it that the light adjustments hadn’t blurred out, I used the vignette tool to darken the edges of the photos around my subject. This is incredibly useful to remove distractions in photos and can you change both the intensity and the radius of the vignette.
Step 5: Retouch

This is perhaps the smallest but most important step in achieving that blackwater photography look. Using the retouch tool, you can erase the tiny flecks of algae and other particles in the water that caught your flash that are distractions from your subject. While you might not notice them when they are there, you will certainly notice that they aren’t once you erase them. This draws the eye to the nudibranch and makes the shot look much more professional. Unfortunately, this is the step that most smart phones do not have capability to perform.

Categories
tags
Subscribe to the blog
Sign up to receive weekly emails with tide pooling information and guides so you never miss a post!

Leave a comment