
How to Instantly Improve Your Tide pool Photography Part 2: DSLR and Mirrorless Cameras

Taking photos at the tide pools is tricky no matter what kind of camera you are using, and DSLR cameras are no exception. Rocky shores present an extreme environment for cameras as water, sand, salt, and sharp, slippery rocks aren’t a great recipe for a clean, fully functioning camera.
For some, bringing a DSLR or mirrorless camera to the tide pools comes with too many risks to be worth it. These cameras and lenses can be very expensive and getting a cool shot isn’t worth possibly scratching your lens or dropping your camera in the water. But for those who do choose to take their “big cameras” to our rocky shores, there are a few ways that you can keep your camera safe while still taking stunning photos at the tide pools.
Protecting Your Camera
If you choose to take your DSLR camera to the tide pools, then protecting your expensive equipment is imperative. The tide pool environment is a perfect place to accidentally get salt in your battery compartment or bang your lens against the rocks, so it’s important to take precautions so your camera is well protected. Here are some tips for doing so.
- Use a camera strap: Some photographers prefer not to use a camera strap most of the time, but at the tide pools this is an absolute must. You will mostly likely not be able to constantly spare a hand while traversing the slippery rocks. Plus, if you slip, reflexes are going to make you catch yourself before hanging onto your camera.
- Hold your camera when you can: If you can spare a hand, hold your camera while navigating the tide pools. Sharp rocks and barnacles are not kind to cameras that are swung into them.
- Use a small camera bag: What I don’t mean here is a big, hulking bag that has all your accessories. I mean a small camera bag that doesn’t hold anything but your camera and the lens attached to it. Put your camera in this bag when you can’t spare a hand so it’s protected when scrambling over the rocks. Even a neoprene casing on your camera will help protect it from damages.
- Use a lens cap: Lenses are both fragile and expensive. Even if you aren’t worried about scratching your lens (even though you probably should be), salt in the air and water droplets can leave residue on lens glass that degrades photo quality and can difficult to clean.
Underwater Housings
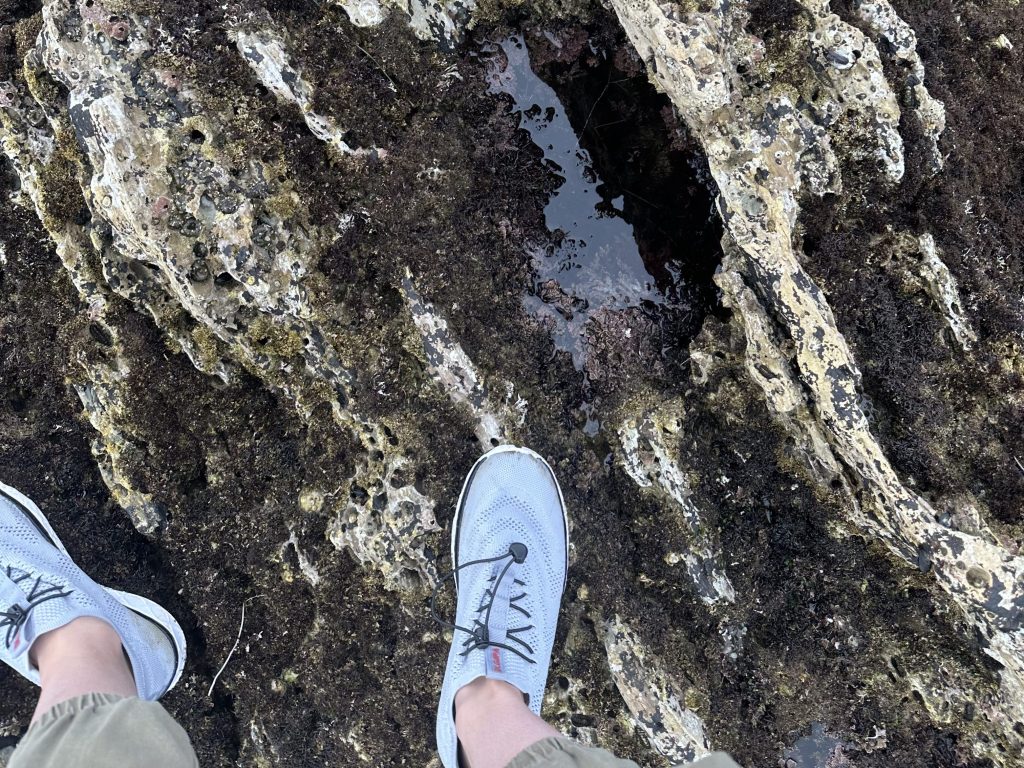
I’m sure there are some underwater divers wondering if they should take their underwater camera housings on their tide pooling adventure. While housings do provide some of the best protection out there, they are simply not practical at the tide pools. Many of the pools where interesting creatures live are much too small for DSLR cameras plus housings to get into; your camera simply won’t fit. The photo below is of a pool where I found two Ancula pacificas, tiny, nearly transparent nudibranchs; you can see my shoe for scale. There is no way a camera housing would have fit into that pool. There have even been occasions where my compact underwater camera would not get close enough to an animal because the rocks created such a tiny space.
Do yourself a favor a leave your housing at home. If you really want underwater photos at the tide pools, a compact underwater camera is the way to go.
Now if you aren’t planning on taking underwater photos and just want to bring your housing for protecting your camera, you have a better argument for bringing it. However, housings are often bulky and restrict what settings you can play with. You will certainly have a safe camera at the end of your tide pooling adventure, but you might be frustrated with how cumbersome it is outside the water.
Tips for taking better tide pool photos with a DSLR camera
Now that you know how to protect your camera, we can dive in to the mechanics of taking better images at the tide pools. All rules of general photography apply here, but there are a few tricks unique to tide pools that are worth exploring.
1. Focus on being artistic and not merely photos for identification
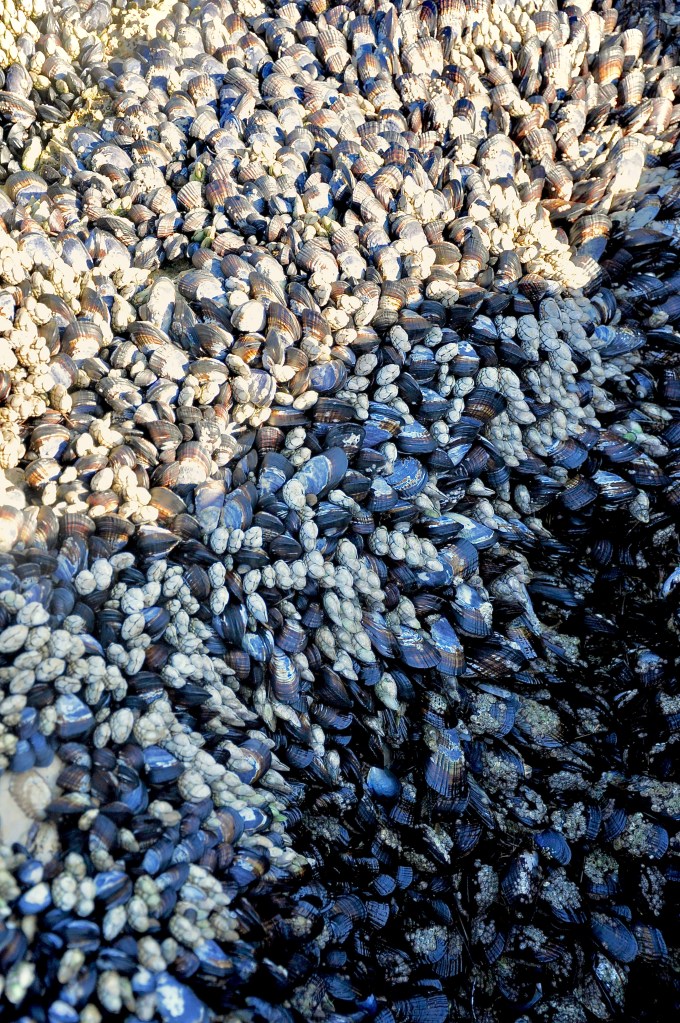
Smart phones have good enough cameras these days to take great identification photos. If you bring your DSLR camera to the tide pools, focus on what it can do that your smart phone can’t. Put it on manual mode and play around with the settings. Get low and experiment with angles. The key is to be creative and play with your camera. The image below is not meant to identify the sessile animals in the photo, but to show patterns and light as well as emphasize how every rock at the tide pools is literally smothered with life.
2. Use a polarizer to fight the glare
Polarizers are lens filters that can help deal with the problem of glare. Tide pool photography is made particularly difficult by both the sunlight reflecting off the water and the glare or reflection of the sky on the water obscuring what’s beneath. A polarizer filters certain wavelengths of light while letting other pass through to your lens. The light physics here are a little complicated, but using a polarizer can help immensely with fighting glare on the water. These lens filters are relatively inexpensive compared to other photography equipment and make a huge difference. You can read my article about smart phone photography for more info about how mitigate glare in tide pool photography. You can also see this article from NatureTTL for more info about how to block out glare without a polarizer.

3. Use motion and reflection
While glare on the water’s surface can be very annoying when taking photos at the tide pools, you might be able to use it for an artistic advantage. Perhaps an image partially obscured by glare can draw more focus to your subject or create an ethereal feeling for what’s below the surface. Tide pool photographers can also use the motion of the water to create artistic images that show the constant change of this ecosystem. The image below of an Panama serpent star makes use of the water ripples to show the incoming tide.

4. Use various depths of field
Depth of field on a DSLR camera is controlled by the aperture and how much light is let into the lens. It essentially measures how much of your image is in focus; is everything in the image in focus or is the background blurry? In the image below, the subject is in focus, but the foreground is blurry, drawing your attention to the sea star. Depth of field is often the difference we see between phone cameras and DSLR cameras. Portrait mode on smart phones has helped, but a photographer doesn’t have nearly the same amount of control as adjusting the aperture on a traditional camera.
If you’d like to experiment with depth of field, put your camera on aperture priority mode which allows you to change the aperture while your camera adjusts the shutter speed for optimal light. Now you can blur the background or foreground to have just your subject in focus.

5. Use a tripod (preferably one you can get wet)
The rocky terrain of tide pools often restricts your movements significantly. Bending over or crouching in a tense position to get the angle your want can be a struggle, not to mention dangerous if you slip. Holding your camera while tense will also contribute to shaking and blurriness in your images, especially if light and your shutter speed are both low. Using a tripod can help mitigate this issue because it frees up both your hands. Get your camera and tripod in the position you want and then get into a comfortable position yourself. Because the rocks are often uneven, you will likely have to experiment with your tripod’s feet to get it stable. Be prepared to have it get wet, but make sure not to place it on top of any sessile animals.


Categories
tags
Subscribe to the blog
Sign up to receive weekly emails with tide pooling information and guides so you never miss a post!

Leave a comment